


QR Tag Timing is an exciting new way for organisers and their participants to be able to operate socially distanced virtual events over set and marked courses. The location and route are pre-set so that everyone runs the same distances, but at a time of their own choosing. Events may take place over one or more days, weeks or even months - the results will be continuously updated.
Each route will, by default, have a Start and a Finish QR Tag - these may actually be the same tag - and may also have additional QR Tags along the route as split time points. Depending on the event these intermediate points may be optional or required.
A route will have been given a minimum time - you can't just scan the start and then scan the finish! - and any required intermediate tags will also need to have been scanned for your time to be validated.
If you entered the event through the Results Base online entry system you will need to see 'Using the receipt' below for instructions on how to time yourself.
If you entered the event through the organiser's own or a third party online entry service you will have been sent an email with instructions - see 'Using the email instructions' below.
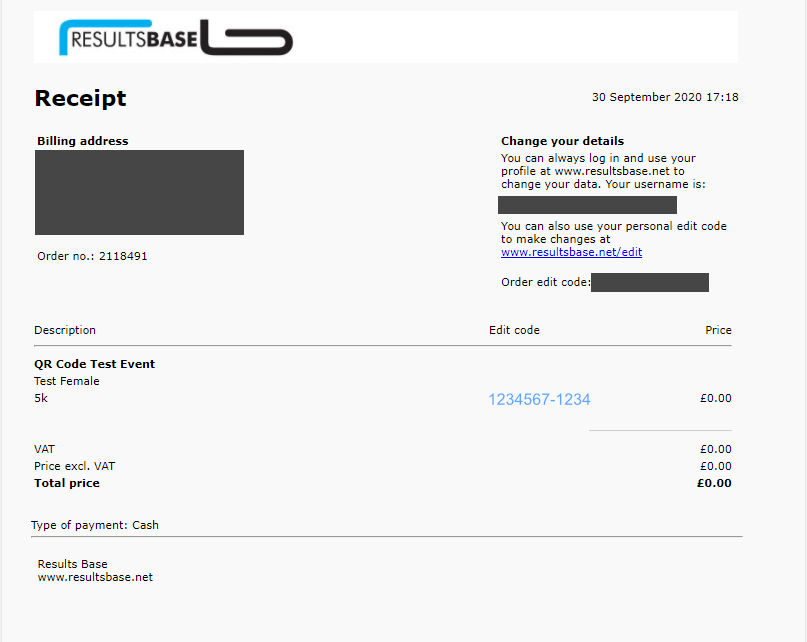
Using the receipt
On your receipt look for the Edit Code which will be to the right of your event registration in the middle of the page. This number (formatted as 1234567-1234) is a hyperlink to your event Ticket which will have a green ENTER YOUR RESULT button.
Click this button to open the event timing page. Your details will be shown along with two buttons, one to scan a QR Code and one to upload a picture of a QR Code - you can use this if there is no signal available at the location. Instructions for using the QR Code scanning and what to do if there is no internet connection (ie taking a picture and uploading it later) are on this page - see Help & Info on the right.
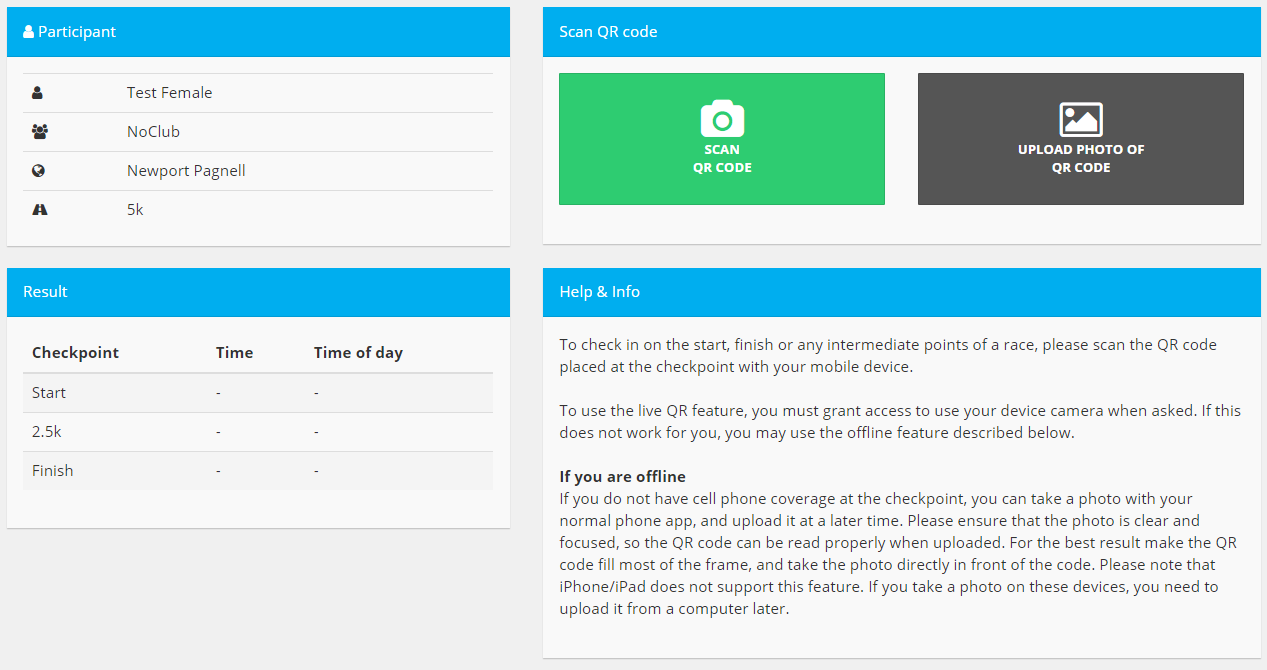
Scanning the QR Tag for the Start will initiate the timing process, you can record any intermediate times as required by the event and then scan the QR Tag for the Finish to stop the timing. Some events may use the same QR Tag for both Start and Finish, the system will know that the second scan is the finish.
As long as there is a live internet connection on your phone your start and finish times will be immediately loaded into the event and your position, etc will be calculated and displayed.
Using the email instructions
Where your event entry has been taken through the organiser's own or a third party online entry service you will have been send an email with event instructions. On this email will be a link which contains the Edit Code that you would have had on your Results Base receipt. This link will take you to your event Ticket which will have a green ENTER YOUR RESULT button.
Click this button to open the event timing page. Your details will be shown along with two buttons, one to scan a QR Code and one to upload a picture of a QR Code - you can use this if there is no signal available at the location. Instructions for using the QR Code scanning and what to do if there is no internet connection (ie taking a picture and uploading it later) are on this page - see Help & Info on the right.
Scanning the QR Tag for the Start will initiate the timing process, you can record any intermediate times as required by the event and then scan the QR Tag for the Finish to stop the timing. Some events may use the same QR Tag for both Start and Finish, the system will know that the second scan is the finish.
As long as there is a live internet connection on your phone your start and finish times will be immediately loaded into the event and your position, etc will be calculated and displayed.